Using native OS X NAT with VirtualBox
07 Nov 2014VirtualBox provides built-in NAT, but on OS X it doesn’t allow to access VM from host, so every time I need to set up host only network. I wanted to have one, fully functional virtual network with NAT routing. OS X has built-in NAT capability that is used by Internet Sharing – why not use it with VirtualBox?
Note: This post is work-in-progress.
VirtualBox configuration
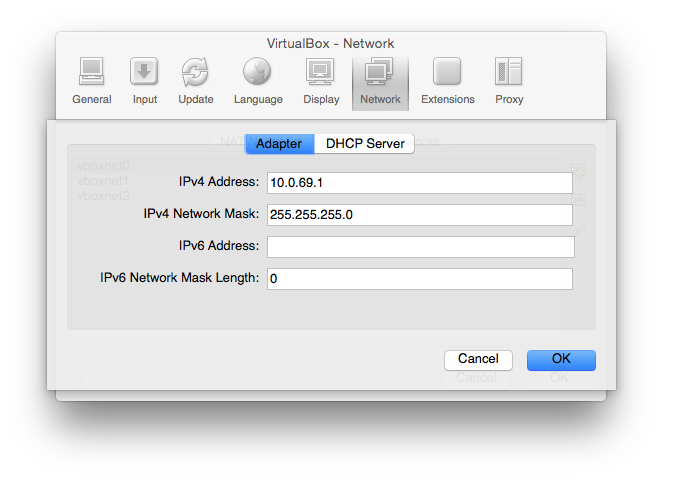
First of all we need to configure host-only network in VirtualBox. I arbitrary choose 10.0.69.0/24 network for purpose of this tutorial. I configured host-only network vboxnet0 to use this network. Remember to disable VirtualBox DHCP server, as it doesn’t allow to provide gateway address.

OS X NAT configuration
First, we need to enable routing capability in OS X network stack. Run sudo sysctl net.inet.ip.forwarding=1 or add
net.inet.ip.forwarding=1
to /etc/sysctl.conf (create this file if necessary) to make this persist over reboots.
Then add the following NAT rules to /etc/pf.conf after rdr-anchor line:
nat on {en0, en1} proto {tcp, udp, icmp} from 10.0.69.0/24 to any -> {en0, en1}
pass from {lo0, 10.0.69.0/24} to any keep state
On my Mac en0 is Gigabit Ethernet and en1 is AirPort. That way NAT will work regardless of what is my current internet connection. You may need to adjust it depending on your configuration.
To load new rules run sudo pfctl -e -f /etc/pf.conf and to ensure that rules are loaded on each boot run:
sudo /usr/libexec/PlistBuddy -c 'add :ProgramArguments:3 string -e' /System/Library/LaunchDaemons/com.apple.pfctl.plist
Add host-only network to VMs
This should be quite straightforward, simply add host-only network to your VMs and run DHCP client or set static ip from chosen network.
DHCP configuration (optional)
This is optional, but you probably want to have DHCP server. We may use OS X built-in DHCP server. First of all, you’ll need to create /etc/bootpd.plist file that setups DHCP server for 10.0.69.0/24 network with dynamic range of 10.0.69.50-254 and providing public DNS server (8.8.8.8) to clients:
<?xml version="1.0" encoding="UTF-8"?>
<!DOCTYPE plist PUBLIC "-//Apple//DTD PLIST 1.0//EN" "http://www.apple.com/DTDs/PropertyList-1.0.dtd">
<plist version="1.0">
<dict>
    <key>bootp_enabled</key>
    <false/>
    <key>detect_other_dhcp_server</key>
    <integer>1</integer>
    <key>dhcp_enabled</key>
    <array>
        <string>vboxnet0</string>
    </array>
    <key>reply_threshold_seconds</key>
    <integer>0</integer>
    <key>Subnets</key>
    <array>
        <dict>
            <key>allocate</key>
            <true/>
            <key>lease_max</key>
            <integer>86400</integer>
            <key>lease_min</key>
            <integer>86400</integer>
            <key>name</key>
            <string>10.0.69</string>
            <key>net_address</key>
            <string>10.0.69.0</string>
            <key>net_mask</key>
            <string>255.255.255.0</string>
            <key>net_range</key>
            <array>
                <string>10.0.69.50</string>
                <string>10.0.69.254</string>
            </array>
            <key>dhcp_domain_name_server</key>
            <array>
                <string>8.8.8.8</string>
            </array>
        </dict>
    </array>
</dict>
</plist>
Then you may enable bootpd with sudo /bin/launchctl load -w /System/Library/LaunchDaemons/bootps.plist. To disable just replace load with unload in the command.
Set static MAC-based DHCP IP addresses (optional)
Create /etc/bootpstab file, here is an example of the content:
#
# bootptab example
#
%%
# machine entries have the following format:
#
# hostname      hwtype  hwaddr              ipaddr          bootfile
client1         1       00:01:02:03:04:05   10.0.0.20
client2         1       00:a0:b2:ef:ff:0a   10.0.0.20